
3.7. Network
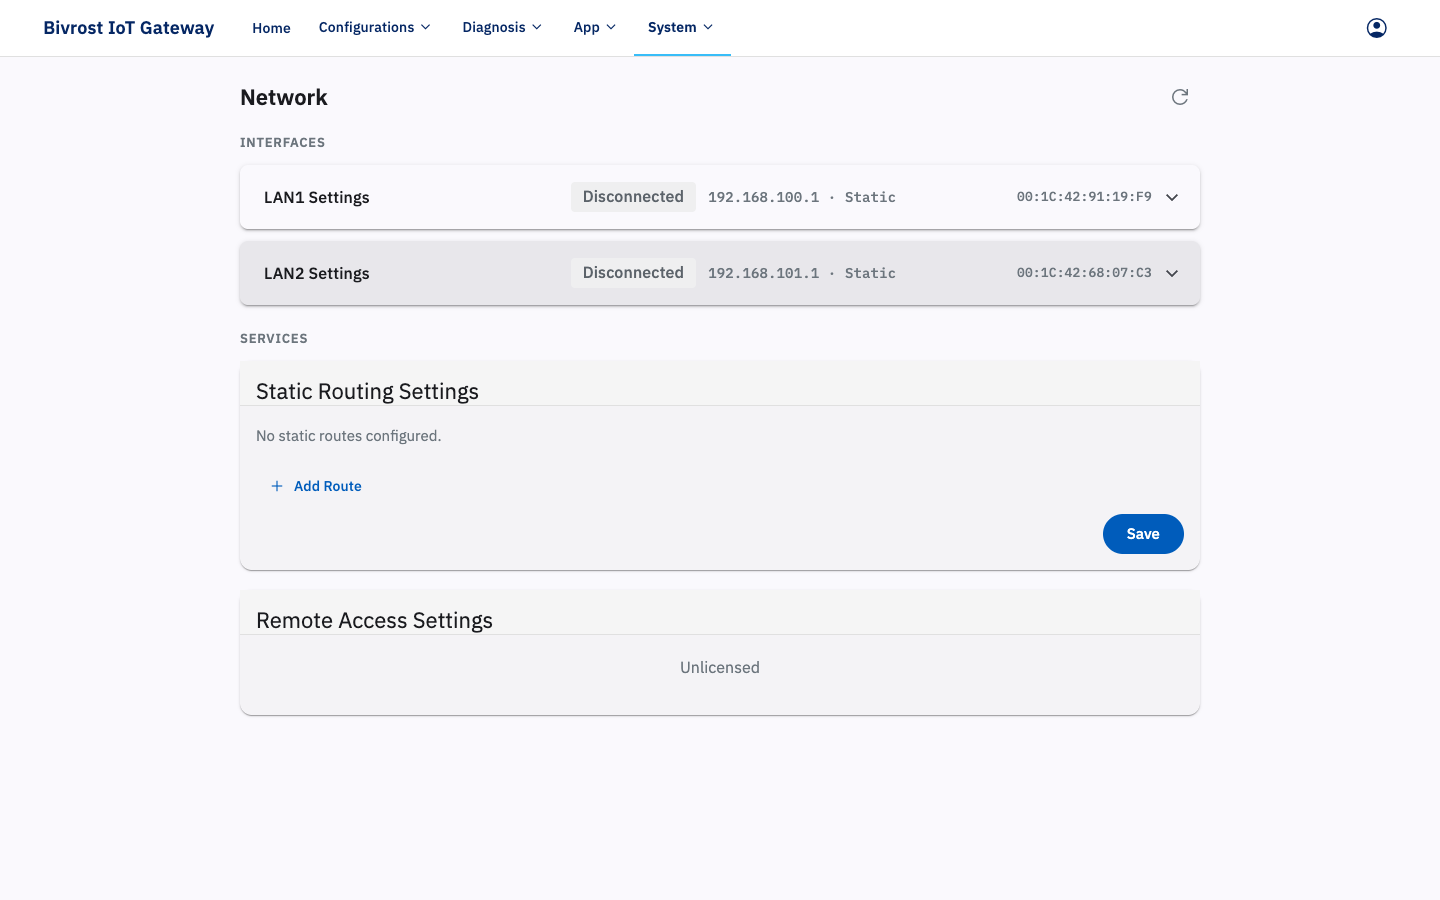
The Network page is split into two parts: “Interfaces” (LAN1, LAN2 and the wireless adapter) and “Services” (Static Routing Settings, Remote Access Settings). Click an interface card to expand its settings.
3.7.1. Wired Network
Section titled “3.7.1. Wired Network”The “Wired Network” section shows the current connection status of the LAN1 port. “Connected” means the LAN adapter has detected a device at the other end of the cable; it does not guarantee that the device can be pinged. You can change the Connection Type of the gateway’s LAN1 port, setting the IP Assignment Mode to DHCP (obtained automatically) or Static (entered manually). LAN1 is normally set to Static, in which case you can edit the IP Address, Subnet Mask, Default Gateway and DNS server settings. The default gateway and DNS server only need to be changed when the company network is restricted; otherwise leave them at their defaults. When you are done, click Save to apply the settings.
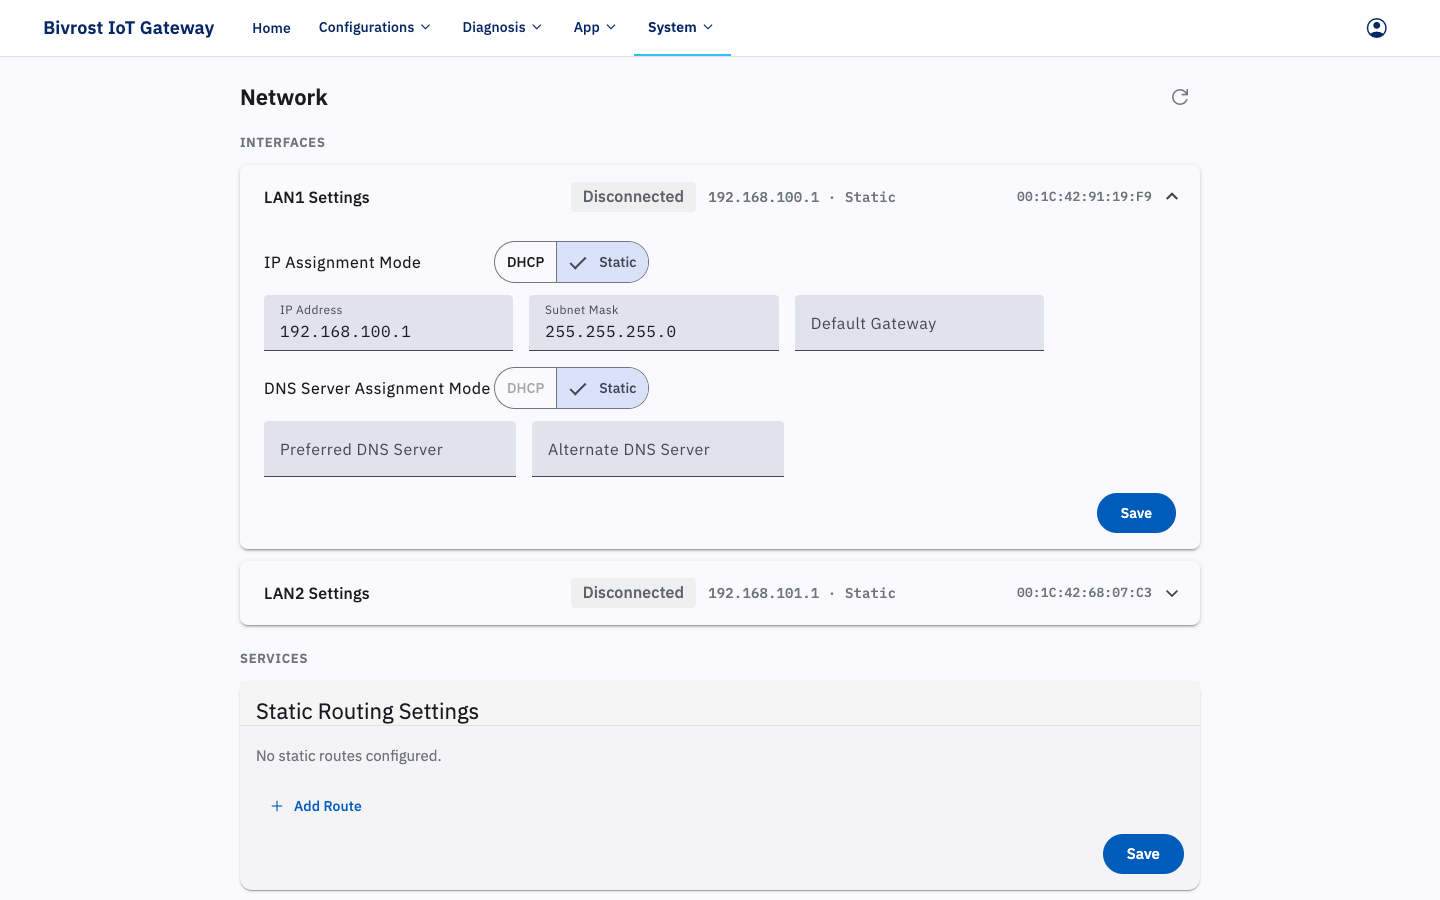
Once the LAN2 Settings option has been enabled under Settings, LAN2 Settings appears below LAN1 Settings and you can change the Connection Type of the LAN2 port; see 3.12. Settings for details.
3.7.2. WiFi Settings
Section titled “3.7.2. WiFi Settings”The gateway is fitted with a wireless adapter and can connect to a WiFi network (models on which the wireless adapter is unavailable do not show this section).
While WiFi is disconnected, click the “WiFi Name” field to scan automatically for nearby networks. You can type a name to narrow the list, then click the network you want to join. For a hidden network, type the full WiFi name manually.
Enter the “WiFi Password” and click Connect. If the connection succeeds, the “Status” field shows “Connected: [WiFi name][signal strength]” and the Connect button changes to Disconnect. Unless you click Disconnect, the gateway reconnects automatically whenever it detects that network again. Clicking Disconnect drops the current network and stops the gateway from reconnecting to it automatically.
Once connected, click Configure to open the “WiFi Settings” dialog. As in 3.7.1. Wired Network, you can change the WiFi IP Address, Subnet Mask and other settings.
3.7.3. Static Routing Settings
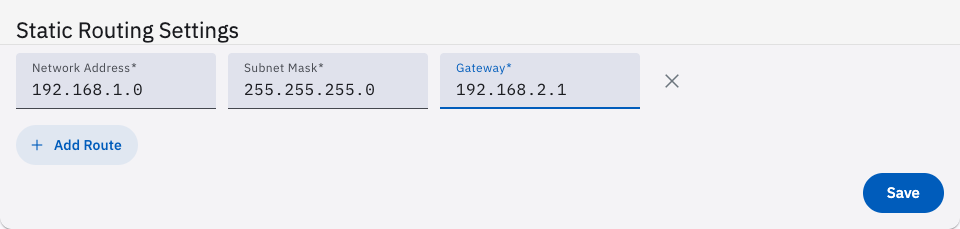
Section titled “3.7.3. Static Routing Settings”You can add static routes here. The route format is:
IP network address 1,subnet mask 1,gateway IP address 1;IP network address 2,subnet mask 2,gateway IP address 2;Separate multiple routes with ;.
3.7.4. Remote Access Settings
Section titled “3.7.4. Remote Access Settings”Once remote access is configured, connecting to a remote server provides the following:
- Remote access to the gateway from outside the local network.
- Bridging of the LAN1 or LAN2 network, so that debugging software can connect to a machine remotely for commissioning.
Checking the remote access configuration takes a while; the status reads “Detecting” while it runs, as shown below.
This feature is not enabled by default and shows the message below. Contact customer support if you need it enabled.

Once the feature has been enabled, the status is “Disconnected” until it is configured for the first time, as shown below.
Click Configure and set up the remote server in the configuration dialog: enter the server address, password and bridge target, then click Confirm. After changing the configuration, you must reconnect to the remote server for it to take effect.
Click the Connect button; the gateway starts connecting to the remote server.
Once connected, the gateway connects to the remote server automatically the next time it comes online, as shown below. Click the Disconnect button to drop the connection to the remote server immediately and stop it from reconnecting automatically next time.