3.4. Groups
On the Groups page you can combine the machines defined on the Machines page into groups. The gateway then uses the data collected from each machine to calculate group-level statistics and uploads them as a package.
After changing anything on the Groups page, return to the home page and click Restart Service for the changes to take effect.
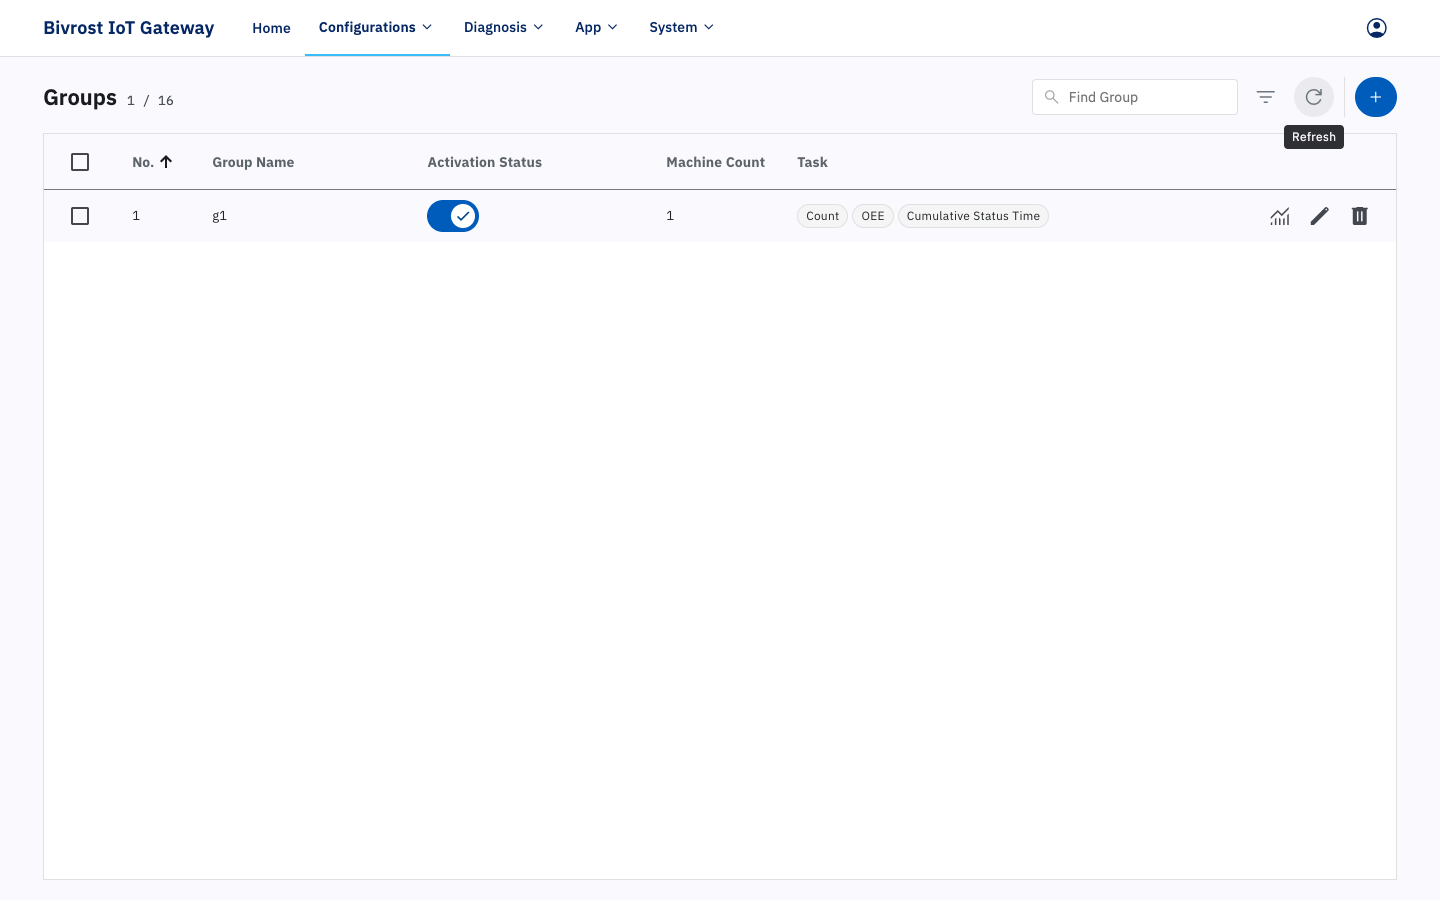
There are three buttons in the top-right corner of the page: Find Group, Refresh and Create Group.
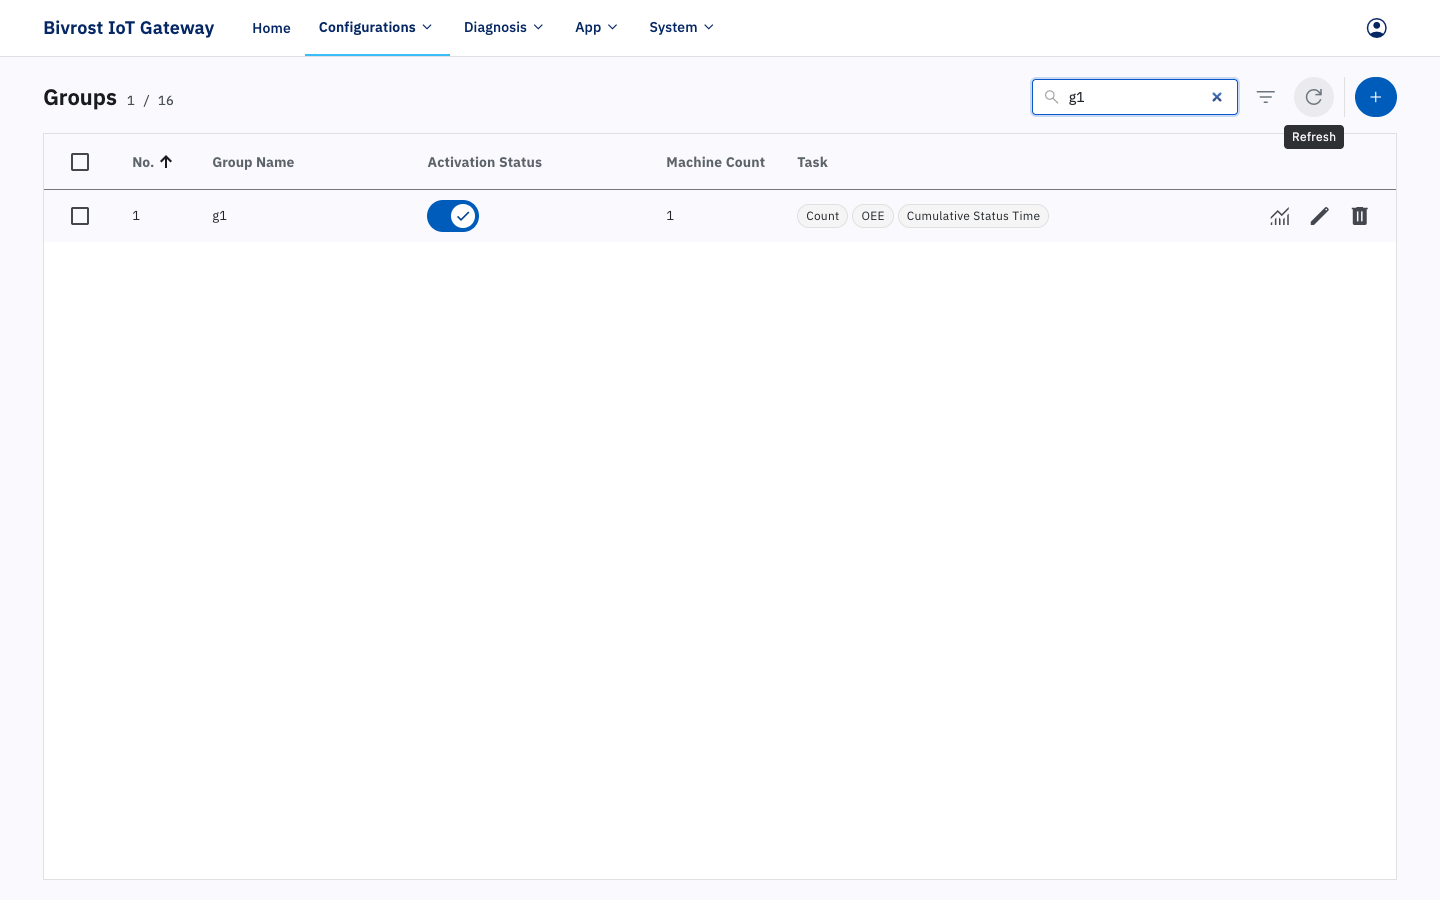
Click the 🔍 Find Group button and type a keyword into the input field to its left; the matching results appear below. The search covers the group number and the group name. Click the close button on the right of the search field to show all groups again.
Click the ↻ Refresh button to refresh the whole group list.
Click the + Create Group button to add a group, as described in 3.4.1. Adding a Group.
3.4.1. Adding a Group
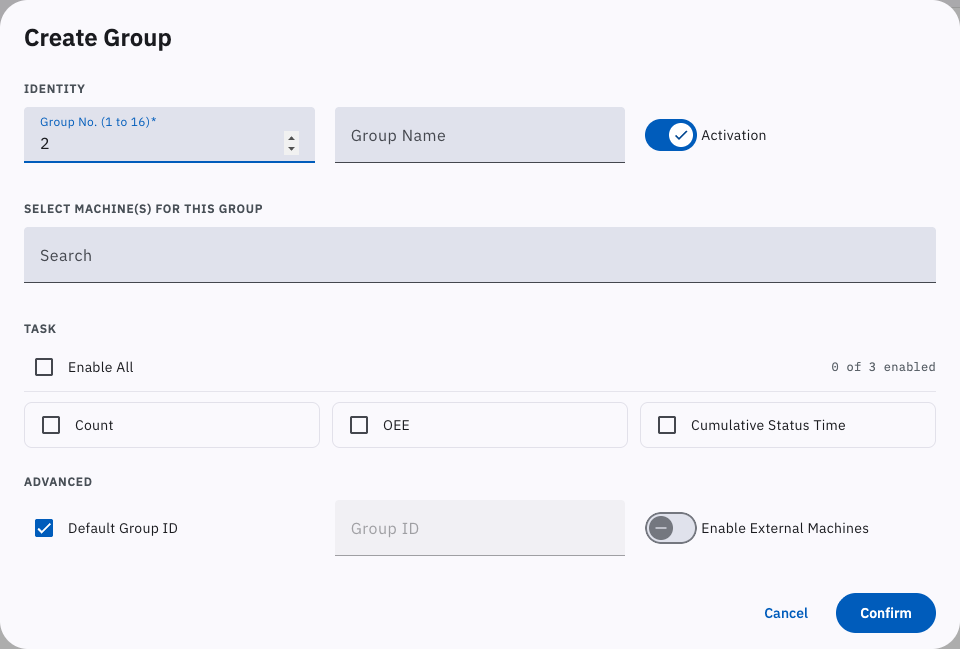
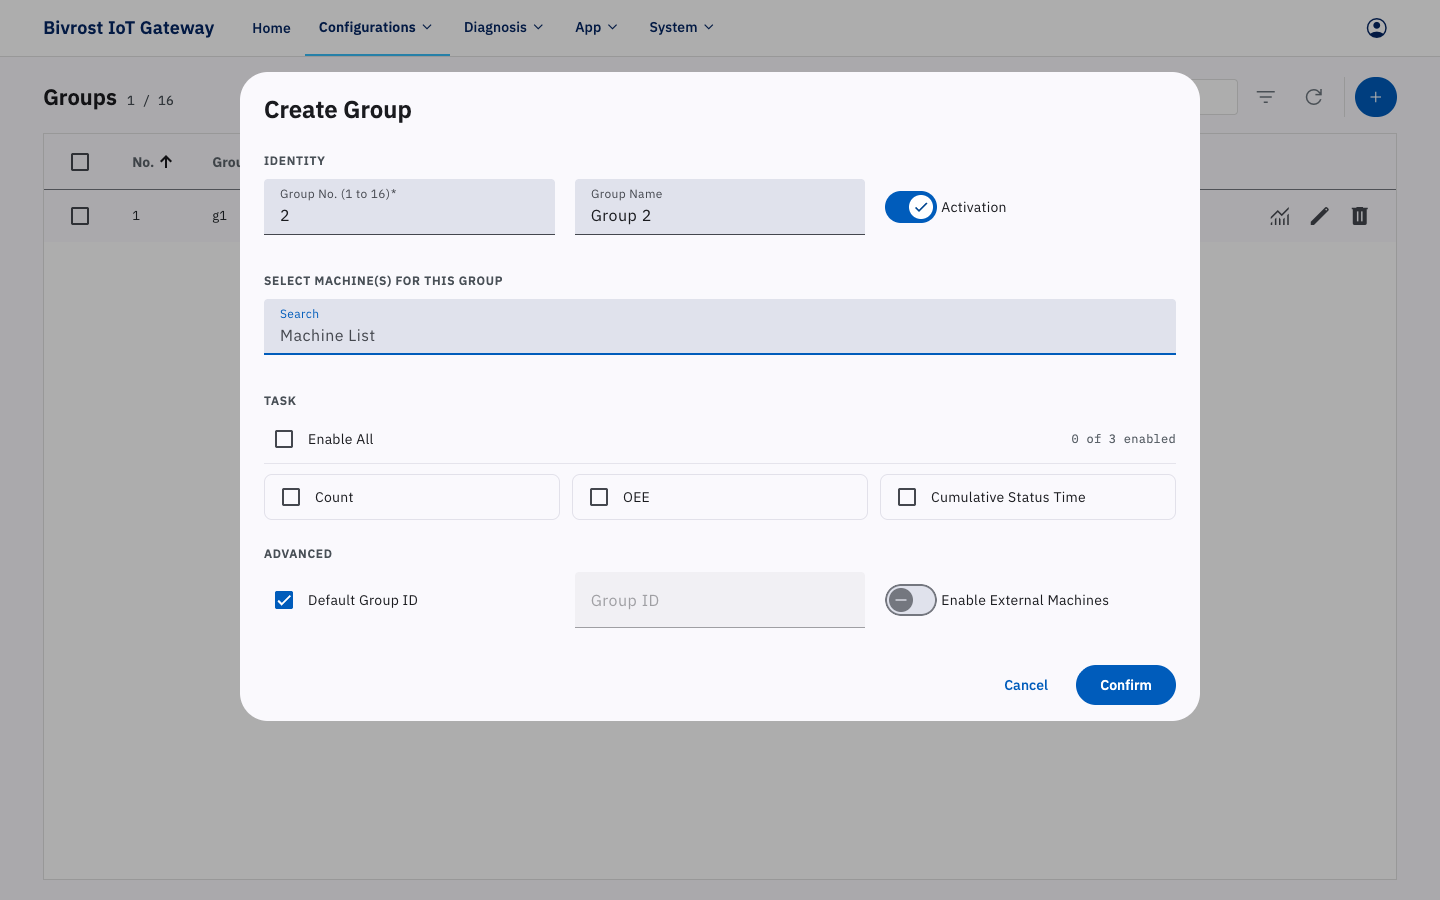
Section titled “3.4.1. Adding a Group”Click the + Create Group button in the top-right corner. The “Create Group” dialog opens, with four sections from top to bottom: “Identity”, “Select Machine(s) for This Group”, “Task” and “Advanced”.
3.4.1.1. Group General Settings
Section titled “3.4.1.1. Group General Settings”In the “Identity” section, enter the group number and the group name. The group number must currently be an integer between 1 and 16 inclusive, and must not duplicate an existing group number. You can also activate or deactivate the group: statistics are uploaded only while the group is activated. Deactivating it disables the group, and its statistics are no longer uploaded. If the group contains a machine that is not activated (for machine activation, see 3.3. Machines), that machine is not added to the collection list and is neither polled nor included in the statistics.
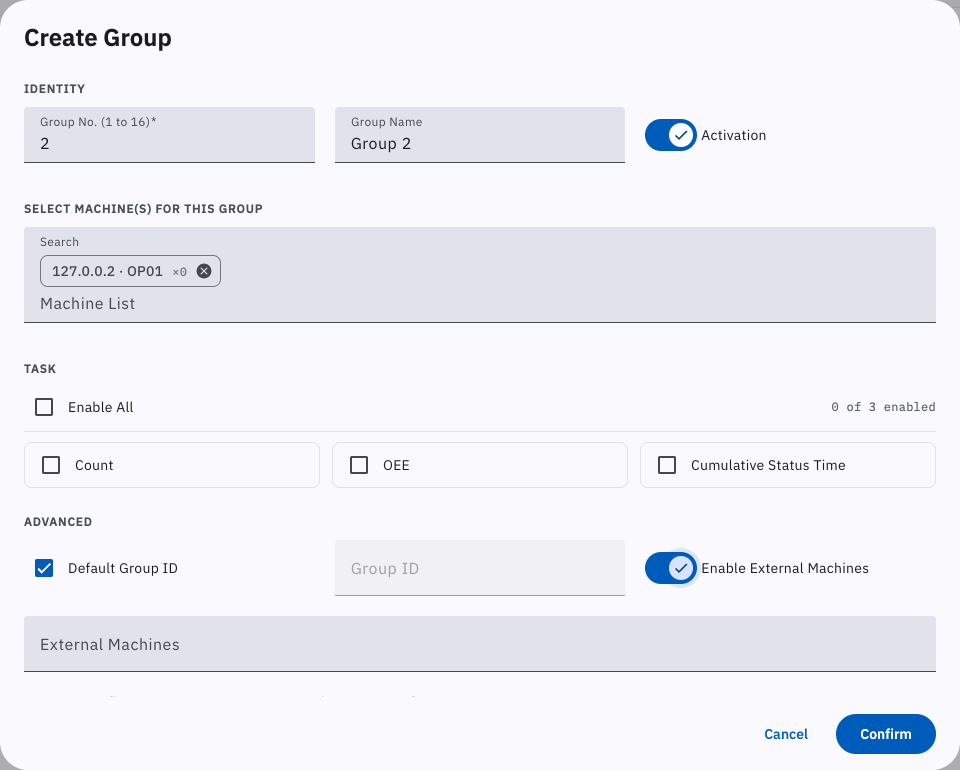
Click the “Search” box under “Select Machine(s) for This Group” and pick the machines for the group from the machine list. The selected machines are shown as tags, and the number of machines in the group appears in the “Machine Count” column on the Groups page.
Each selected machine tag shows the machine IP, the machine name and the count multiplier (for example ×0). Click the × on the right of a tag to remove that machine.

Adjusting the count multipliers of the machines in a group lets you define how the group’s count is calculated. Click a selected machine tag to edit its count multiplier.
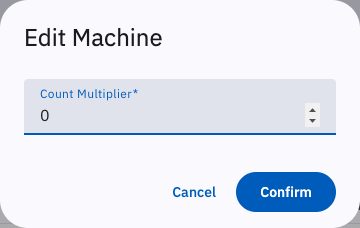
For example, if machine “OP01” and machine “OP02” form a production line and handle two consecutive operations, the output of the line should be taken from the last operation, “OP02”. Set the count multiplier of “OP01” to 0 and that of “OP02” to 1, giving:
Group Count = "OP01" Count * 0 + "OP02" Count * 1If the last operation is handled by several machines, set the count multiplier of all of those machines to 1.
If a machine produces several parts per cycle, set its count multiplier to the corresponding number.
By enabling external machines you can add to the group machines that belong to the gateways linked in Cloud Settings or Hub Settings. This requires a command that identifies the gateway and the machine; see 11.2.6. External Machines.
3.4.1.2. Group Task Settings
Section titled “3.4.1.2. Group Task Settings”In the “Task” section, configure the group’s automatic collection tasks. Tick an available interface to turn on automatic statistics collection and upload for the corresponding group task. The number of enabled tasks appears in the “Task Count” column of the table on the “Groups” page.
Group tasks work in much the same way as machine tasks: their results can be uploaded automatically through the cloud platform, MODBUS, MQTT or a database. To receive group task results, at least one of the cloud platform, MODBUS, MQTT or database communication methods must be enabled and configured in 3.6. Communication. The collection interval and the detailed settings for group tasks are configured in 3.5. Tasks. For the format in which group task results are published over MODBUS, MQTT and a database, see 6. MODBUS Communication, 7. MQTT Communication and 8. Database Communication.
Group OEE data covers all activated machines in the group: total Off time, total Wait time, total Emergency time, total Autorun time, total Manual time, the current number of machines that are Off, Wait, Emergency, Autorun and Manual, and the group availability. See 11.1.2. Group OEE Data.
For the group part count, see 11.1.3. Group Part Count.
Both group OEE and the group part count require local caching, so the “Local Caching” switch under Options in 3.12. Settings must be turned on before you enable them.
Group Cumulative Status Time is the total time spent in each status, summed over all machines in the group, since the gateway started collecting from those machines, in seconds.
3.4.1.3. Advanced Settings
Section titled “3.4.1.3. Advanced Settings”In the “Advanced” section you can define a custom group ID (GroupID). The group ID identifies the group’s data for every communication method except MODBUS. The default group ID is the letter g followed by the group number, for example “g1”.
3.4.2. Editing a Group
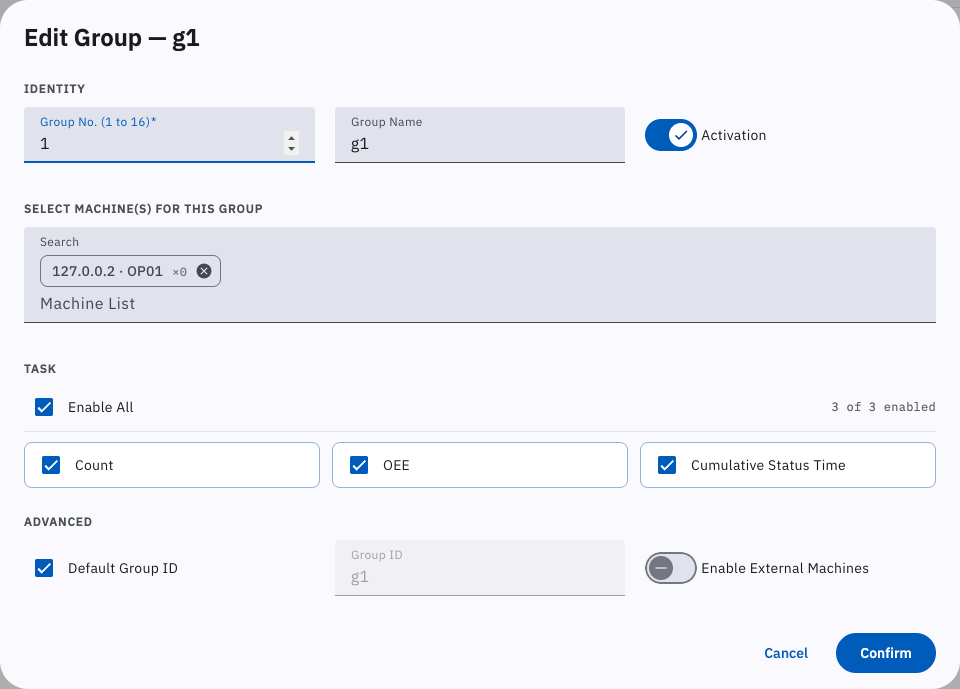
Section titled “3.4.2. Editing a Group”Click the Edit button in the “Operations” column on the right of an existing group row to open the “Edit Group” dialog, which is similar to “Create Group”. Here you can change the group number, group name and activation state, select the machines in the group, adjust their count multipliers, configure group tasks, change the group ID, and so on.
3.4.3. Deleting a Group
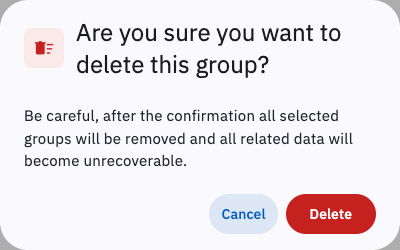
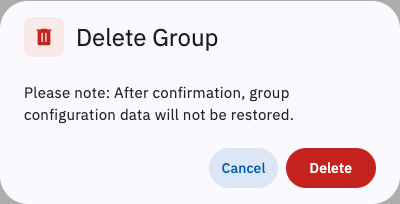
Section titled “3.4.3. Deleting a Group”Click the Delete button in the “Operations” column on the right of an existing group row. The “Delete Group” dialog appears; click Confirm to delete the group.
3.4.4. Batch Activation
Section titled “3.4.4. Batch Activation”Select several groups using the checkboxes at the far left of the list, or the select-all button at the top left of the list.
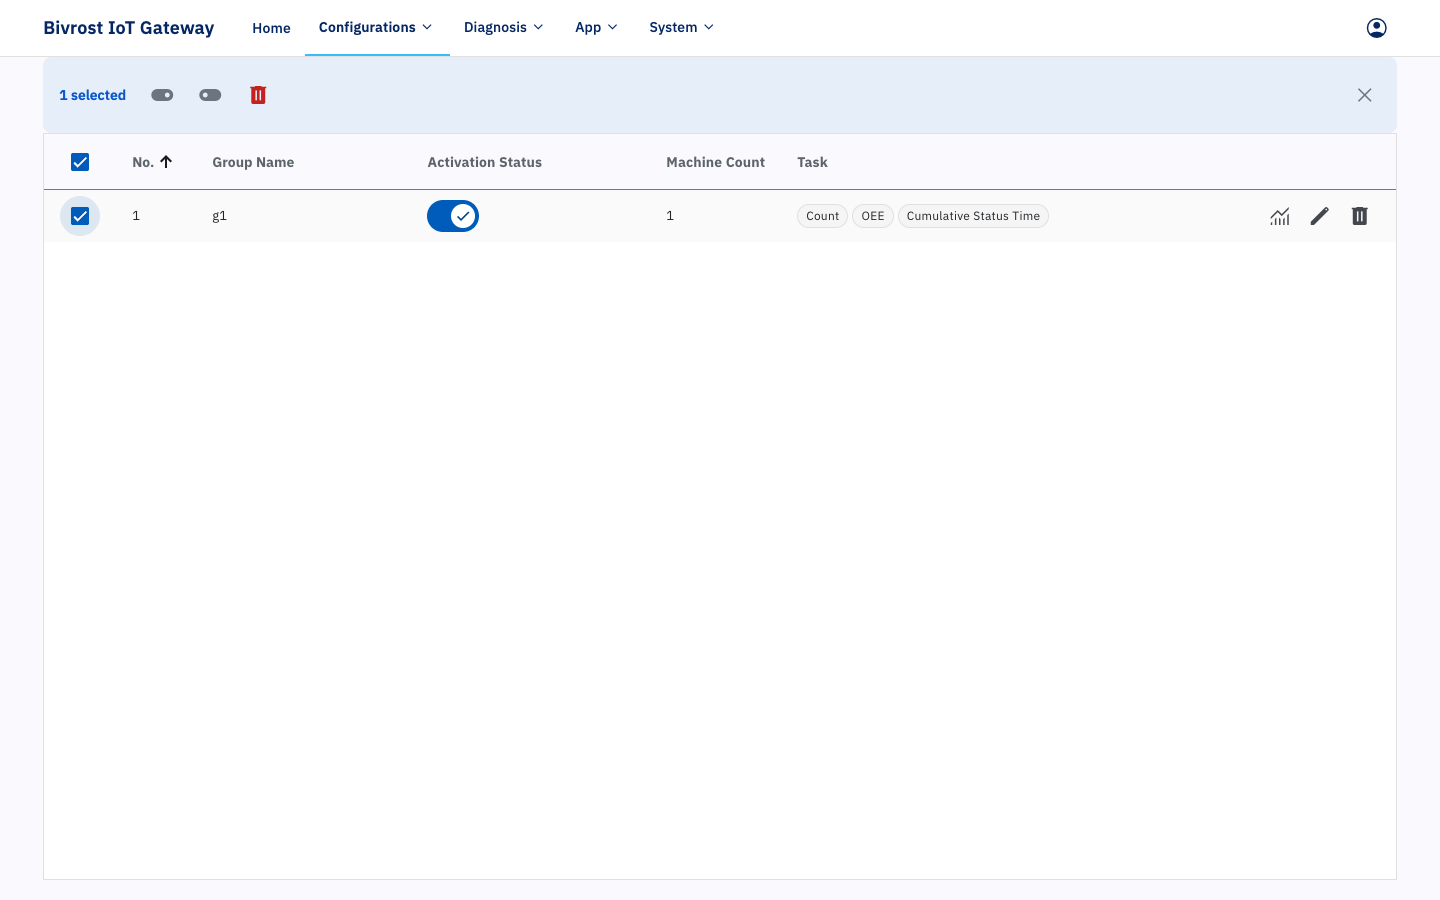
A batch action bar then appears at the top of the page with the Activate, Deactivate, Batch Delete and Clear Selection buttons.
Click Activate or Deactivate to activate or deactivate all the selected groups at once.
3.4.5. Batch Delete
Section titled “3.4.5. Batch Delete”Select several groups using the checkboxes at the far left of the list, or the select-all button at the top left of the list.
Click Batch Delete on the batch action bar, then click Confirm in the dialog that appears to delete the selected groups.