3.12. Settings
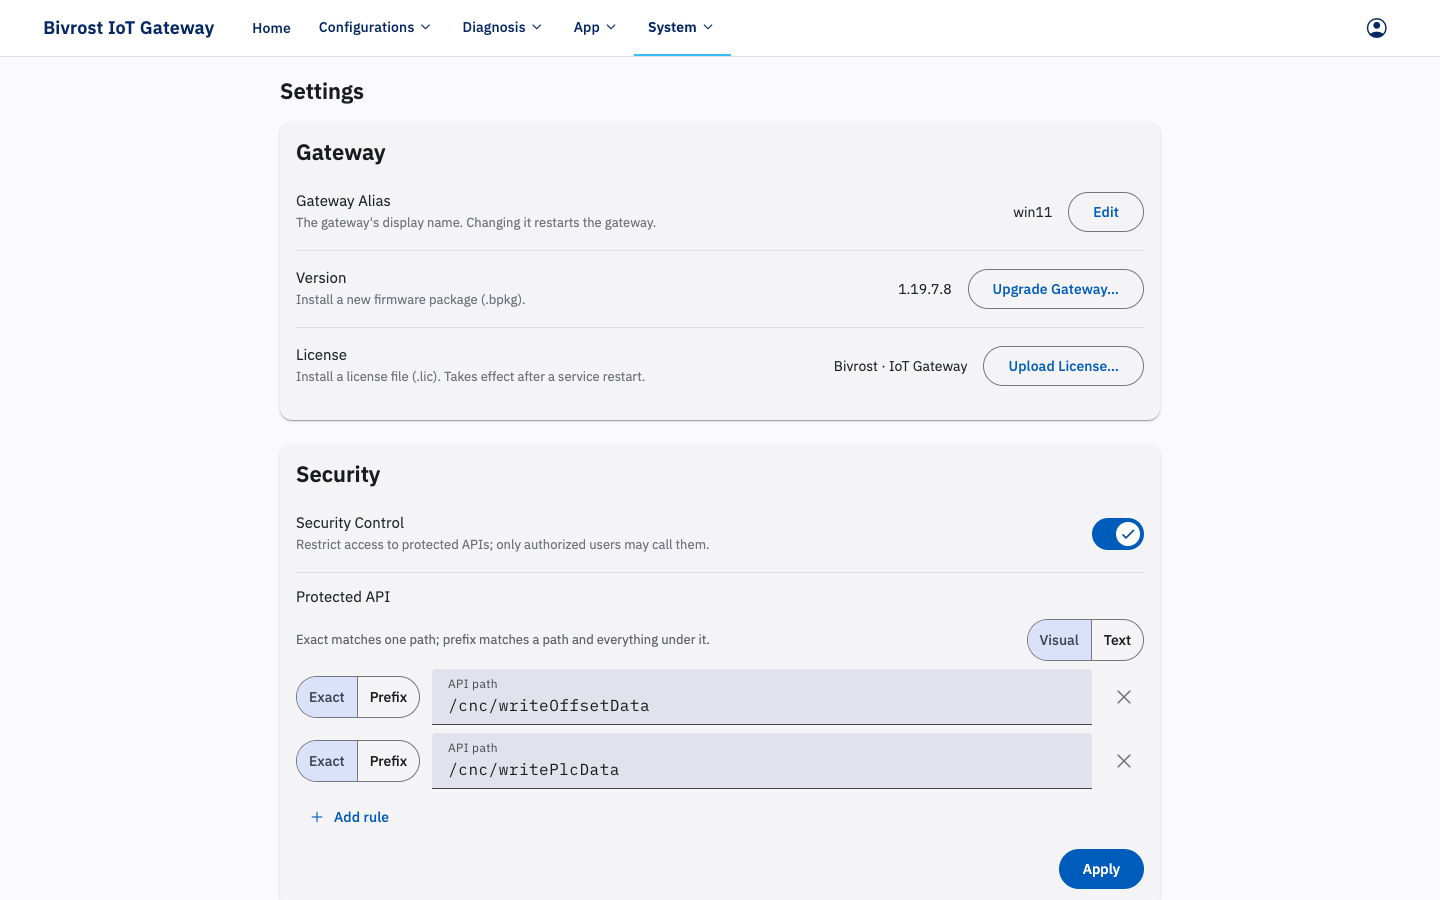
The Settings page is where you configure and maintain the gateway’s advanced functions: user permissions, license updates, software upgrades, API security, time and region settings, and so on.
When you sign in with an administrator account (for example the initial admin account), the Settings page shows the following cards from top to bottom: Gateway (Gateway Alias, Version, License), Security, Options, Time And Region Setup, Backup & Restore and Users & Access.
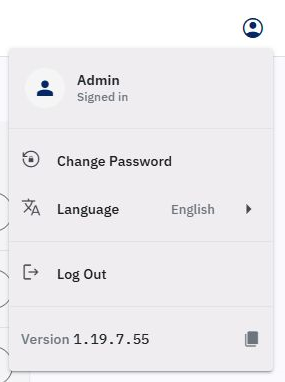
When you sign in with a standard user account, you can change your password, switch language and sign out using the account menu at the top right, and switch language in the Time And Region Setup card.
The instructions below describe the interface as seen by an administrator. Unless stated otherwise, a setting can only be changed while signed in as an administrator.
3.12.1. Account Menu
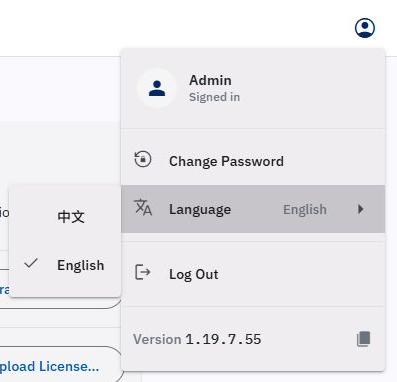
Section titled “3.12.1. Account Menu”Click Account at the top right. The menu shows Change Password, Language, Log Out and the gateway version in that order. These items are available to administrators and standard users.
3.12.1.1. Change Password
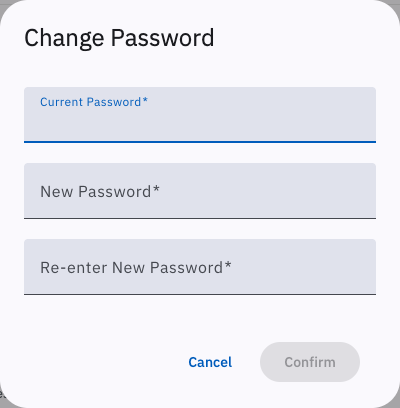
Section titled “3.12.1.1. Change Password”Click the Account button at the top right of the page to open the account menu, choose Change Password, enter your current password to verify your identity, then enter the new password and click Confirm to apply the change. Once the change is confirmed, you must use the new password the next time you sign in. This function is available to administrators and standard users alike.
3.12.1.2. Language
Section titled “3.12.1.2. Language”Choose Language, then select 中文 or English in the submenu. The current language is marked with a checkmark. This changes the web interface language.
3.12.1.3. Log Out
Section titled “3.12.1.3. Log Out”Choose Log Out to end the current login session and return to the sign-in page.
3.12.1.4. Version
Section titled “3.12.1.4. Version”The bottom of the menu shows the gateway software version. Click it to copy the version to the clipboard when contacting support.
3.12.2. Gateway
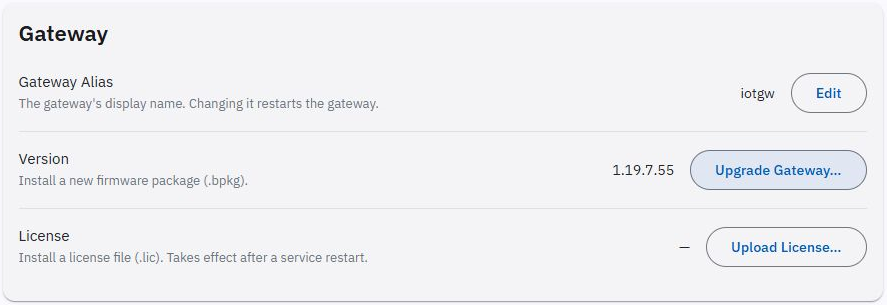
Section titled “3.12.2. Gateway”The Gateway card shows Gateway Alias, Version and License from top to bottom.
3.12.2.1. Change Gateway Alias
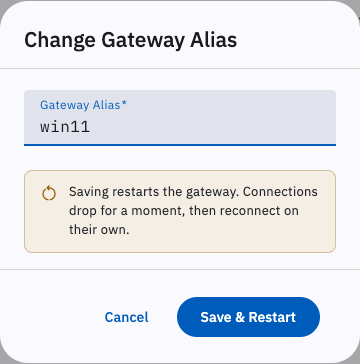
Section titled “3.12.2.1. Change Gateway Alias”In the “Gateway” card, click the Edit button to the right of the Gateway Alias to open a dialog where you can change it. The alias is also the gateway’s domain name, which is used both to reach the gateway and for MQTT communication (see 3.6.3. MQTT Settings). The default alias is iotgw. If you reach the gateway by domain name, use the new domain name to sign in after changing the alias.
3.12.2.2. Upgrade Gateway
Section titled “3.12.2.2. Upgrade Gateway”Upgrade Gateway… in the “Gateway” card uploads an upgrade package (.bpkg) to update the gateway software.
The procedure is similar to “Upload License”: contact support to obtain the upgrade package, save it on your computer, then click the Upgrade Gateway… button to upload it. An upload progress dialog appears — please wait a moment; you can click Cancel at any time to abort the upload. Once the package has uploaded successfully, a confirmation dialog appears; click Confirm to start the upgrade. Wait about 10 seconds, then refresh the Home page and check the gateway version under Gateway Details.
3.12.2.3. Upload License
Section titled “3.12.2.3. Upload License”Upload License… in the “Gateway” card uploads a new license file (.lic) to change the license type, raise the license count and so on. If you need to do this, contact support with the gateway UID (see 3.2.3. Gateway Details) and the license type and count you want. Once you have received the new license file on your computer, click the Upload License… button, select the license file in the dialog that opens, and click Open to upload it. When the upload finishes, click Restart Service on the Home page (see 3.2.1. Function Buttons) for it to take effect. After restarting the service and refreshing the Home page, check that “License Type”, “License Count” and “License Status” under Gateway Details match what you expect; contact support if anything looks wrong.
3.12.3. Security
Section titled “3.12.3. Security”3.12.3.1. Security Control
Section titled “3.12.3.1. Security Control”The “Security Control” switch turns API access control on or off; it is on by default. With the switch on, you can edit the protected APIs.
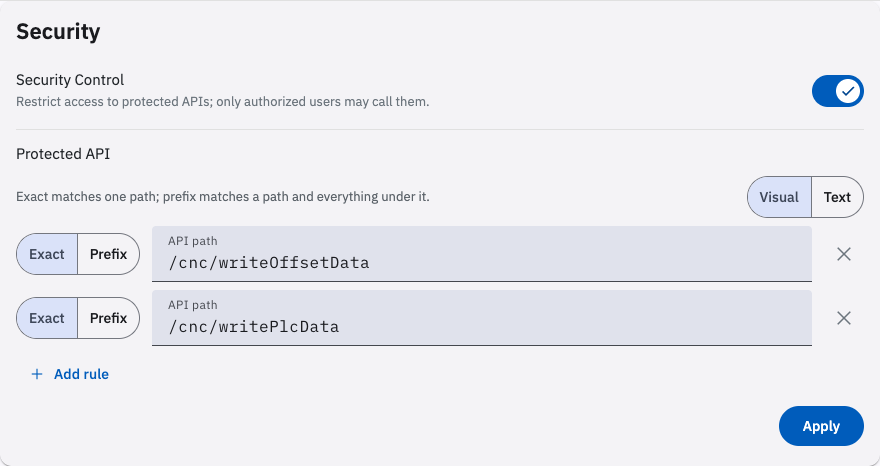
“Protected API” lists the APIs that may not be called. By default, Write Offset Data and Write PLC Data are blocked: writing incorrect data through either interface can cause injury, death or equipment damage, so only use them once you have confirmed it is safe to do so. To change the list, see 11.2.7. Protected API and Authorized APIs, then click Apply.
After changing “Security Control” or “Protected API”, click Restart Service on the Home page for the change to take effect.
3.12.4. Options
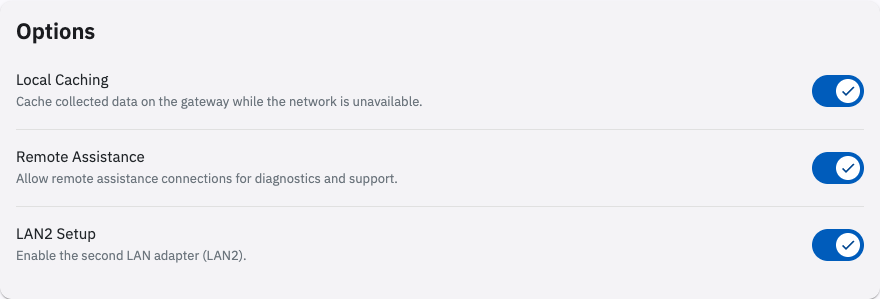
Section titled “3.12.4. Options”The Options card contains the Local Caching, Remote Assistance and LAN2 Settings switches from top to bottom.
3.12.4.1. Local Caching
Section titled “3.12.4.1. Local Caching”The “Local Caching” switch turns local caching on or off; it is on by default. Local caching stores recently collected data and run logs on the gateway so that it can serve historical data and the statistics derived from it, such as machine status statistics and count records for a past period. Data is kept locally for at most 365 days. Turning local caching off disables some gateway functions, so we recommend leaving it on. If you change this switch, click Restart Service on the Home page for it to take effect.
3.12.4.2. Remote Assistance
Section titled “3.12.4.2. Remote Assistance”The “Remote Assistance” switch turns remote assistance on or off; it is on by default. When it is on, support staff can reach the gateway over the internet. You can turn this option off for normal operation; if you need remote assistance, contact support first, then turn the option back on once the gateway is connected to the internet. Changes to this switch take effect immediately — no Restart Service is needed.
3.12.4.3. LAN2 Settings
Section titled “3.12.4.3. LAN2 Settings”The “LAN2 Settings” switch shows or hides the LAN2 settings on the Network page; it is off by default. With the switch on, you can change the LAN2 settings on the Network page, following the same steps used for LAN1 in 3.7.1. Wired Network.
3.12.5. Time And Region Setup
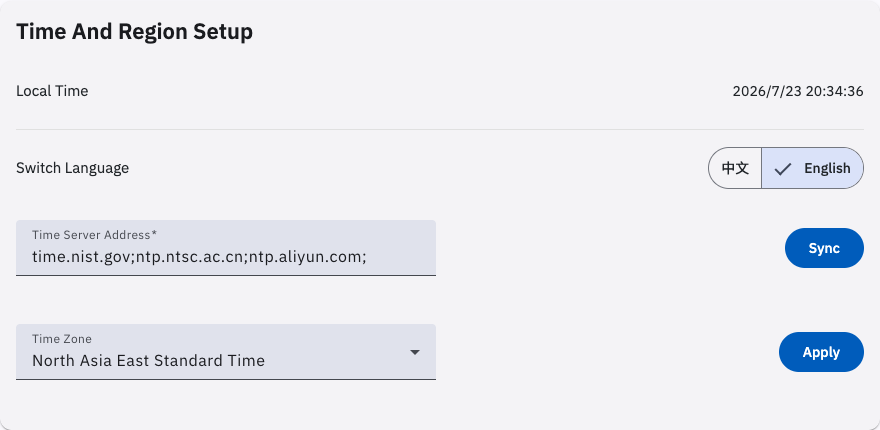
Section titled “3.12.5. Time And Region Setup”“Time And Region Setup” covers Local Time, Switch Language, Time Server Address and Time Zone.
3.12.5.1. Local Time
Section titled “3.12.5.1. Local Time”“Local Time” shows the gateway’s current time.
3.12.5.2. Switch Language
Section titled “3.12.5.2. Switch Language”“Switch Language” switches the gateway’s web interface between Chinese and English. It does the same thing as the language selector at the top right of the sign-in page and the Language item in the account menu.
3.12.5.3. Time Server Address
Section titled “3.12.5.3. Time Server Address”“Time Server Address” takes the addresses of the servers used for time synchronization (separate multiple addresses with “;”). The default is ntp1.aliyun.com;ntp2.aliyun.com;ntp3.aliyun.com;ntp4.aliyun.com;, the Alibaba Cloud public time servers, which require an internet connection. Click the Sync button on the right to synchronize the time: the gateway starts with the first address and moves on to the next one if it fails, stopping as soon as one succeeds. The current time server address is saved only if synchronization succeeds.
3.12.5.4. Time Zone
Section titled “3.12.5.4. Time Zone”“Time Zone” selects the time zone the gateway is in. The default is “China Standard Time”, i.e. Beijing time. Click the Apply button to save.
3.12.6. Backup & Restore
Section titled “3.12.6. Backup & Restore”The Backup & Restore card provides Backup Config, Restore Config and Factory Reset from top to bottom.
3.12.6.1. Backup Config
Section titled “3.12.6.1. Backup Config”Backup Config backs up the gateway’s current configuration file. Click the Backup button to download it.
3.12.6.2. Restore Config
Section titled “3.12.6.2. Restore Config”Restore Config restores the gateway configuration from a backup file. Click the Restore Config… button and upload a gateway configuration backup file to restore the configuration. This operation cannot be undone.
3.12.6.3. Factory Reset
Section titled “3.12.6.3. Factory Reset”Click Factory Reset in the Backup & Restore card, enter the gateway administrator username and password, then click the Factory Reset button to continue. Leave the cluster before resetting a cluster member.
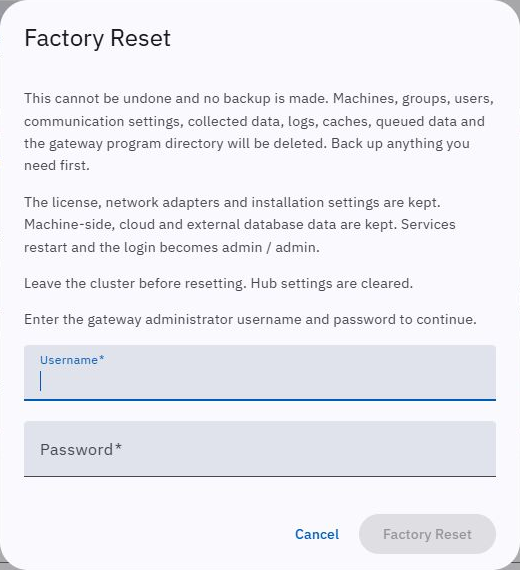
The license, network adapters (including saved Wi-Fi networks), system VPN and installation settings are kept. Machine-side, cloud and external database data are kept. The software version stays the same.
Locally, confirmed completion clears the login session and opens the login page. Sign in with admin/admin. Wait a few minutes for the local database to initialize.
3.12.7. Users & Access
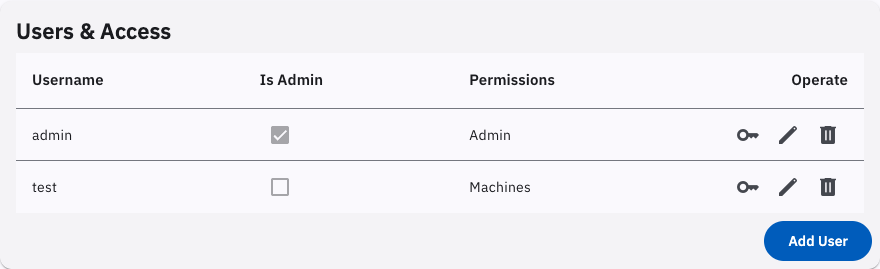
Section titled “3.12.7. Users & Access”The “Users & Access” card lets you add, edit and delete gateway users, and edit their permissions.
3.12.7.1. Add User
Section titled “3.12.7.1. Add User”Click the Add User button on the card to create a new user.
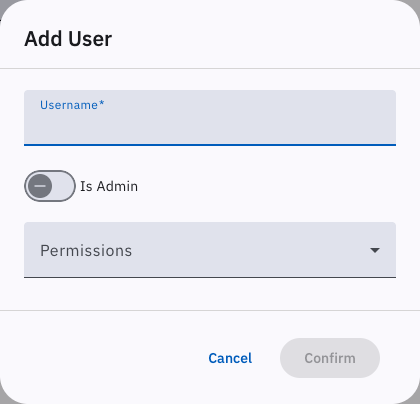
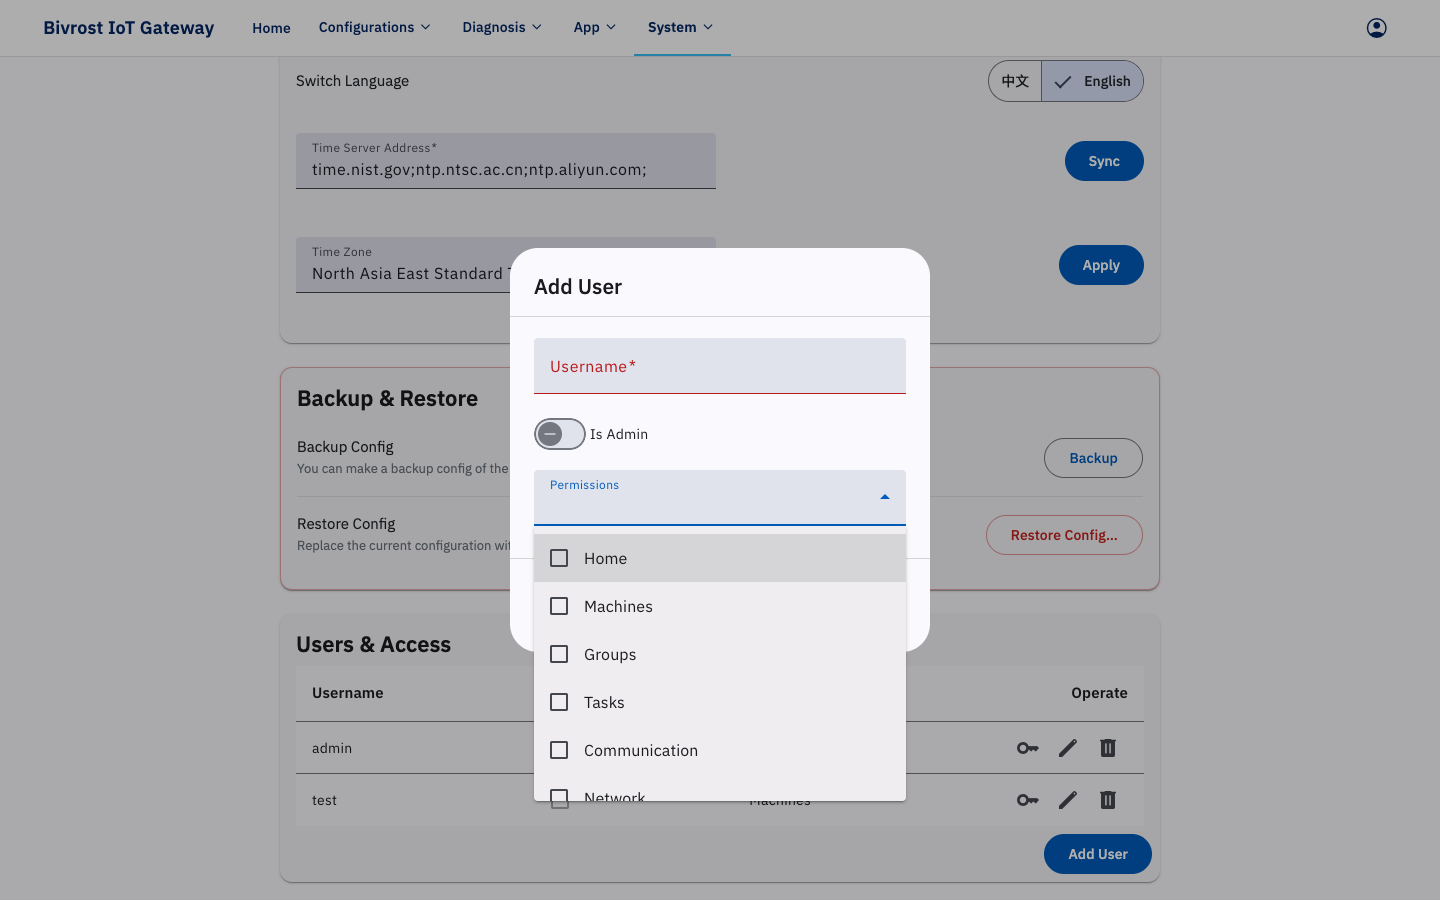
In the dialog that opens, set the username, choose whether the user is an administrator, and assign permissions. A new user’s initial password is the same as the username. There are two user types: administrator and standard user. An administrator has full access to every page and setting on the gateway. A standard user can only open the pages granted to them; tick those pages in the permissions box. Click Confirm when you are done.
3.12.7.2. User Security Settings
Section titled “3.12.7.2. User Security Settings”In the management dialog, click the shield button 🛡 in the action column of a user’s row to open the User Security Settings dialog, where you can set a Secret Key and Authorized APIs. User security settings only take effect once the Security Control option is enabled.
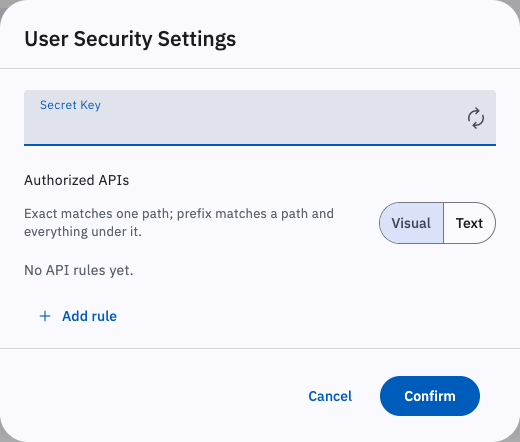
The Secret Key authenticates a user by key when calling an API; see 5.3.2. Secret Key. The key must start with “sk-”. Click the Generate Secret Key button 🔄 to the right of the Secret Key field to generate a random key.
Authorized APIs specifies which interfaces the user may call; see 11.2.7. Protected API and Authorized APIs for how to set them.
Click Confirm to save your changes.
3.12.7.3. Edit User
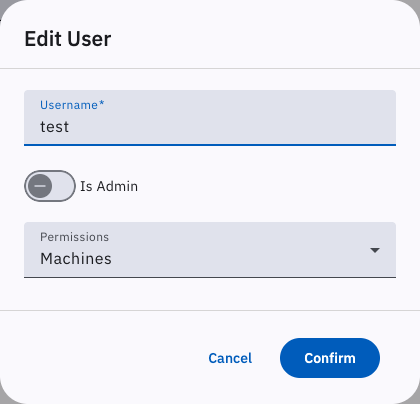
Section titled “3.12.7.3. Edit User”In the management dialog, click the edit button ✏️ in the action column of a user’s row to change the username, administrator status and page permissions. Click Confirm to apply the change.
3.12.7.4. Delete User
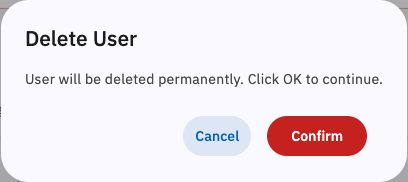
Section titled “3.12.7.4. Delete User”In the Manage Users dialog, click the delete button 🗑 in the action column of a user’s row and confirm to delete the user.